Monday, October 28, 2013

Ready to Start Polishing

Here's the work that I have so far. As far as I'm concerned the animation is ready to move on to pass 4.
Some observations that I have made after working with the rig:
1. The tail is pain to animate, I think I should have went with an IK, rather than an FK on an IK, the slightest hip movement magnifies the tail's movement

2. I put too many controls on the head. I got the entire head control on one control curve which means a LOT of keyframes. I should have placed the main controls on one curve and the details like hair and overlapping tools on another curve.

Other than those observations, I think it's a pretty good rig.

Anyways, here's the progress video:


Monday, October 14, 2013

Progress 10-14-13

So here's my progress so far. I made some time changes and I finally finished the plane twirl scenes. Some of them are probably going to need to be tweaked a little more.


Monday, September 30, 2013

Story Reel 9-30-12

Here's the work so far:


Also, did some more work on the cockpit in the plane. Added windows, I might add some glass, but for right now, I'm just leaving it open and see if it will work:


Monday, September 23, 2013

Story Reel 9-23-13

Here's the progression so far. Fixed a couple shots, which decreased the overall time of the film, but I added shots in that I forgot to add in the last, which added even more time than what I originally had.

Monday, September 16, 2013

Story Reel 9-16-13

Here is my current Story Reel, got most of the shots up to pass 3. Still need to tweek a few things here and there, and adding more blinks. There's no sound with this one. Sound probably won't come until it's about time to render it out.

Wednesday, September 11, 2013

Animation Progress01 Pass3

This weekend, I've been working hard on my animation. Here's the progress I have on some of the shots of pass 3.

I also completely finished the rig... apart from the tongue. I added more blendshapes including the ears. the joints in the ears weren't working the way I wanted them, but blendshapes got what I wanted.


I'm running into some problems where in some of these shots, I accidentally rotated limbs past 360. So, I'm having to manually subtract or add 360 to some of these channels. I'm thinking there has to be a way to change a number of keys and subtract or add 360 to the number, but I haven't found it yet.

Tuesday, August 20, 2013

Monday, August 12, 2013

Pre Final Movie Reel

Here is the movie reel so far. Needs a few more adjustments, but it's close to complete, as close as pass 2 comes that is.


Here is the character sheet for Johnny


Thursday, August 1, 2013

Johnny's Adventure Movie Reel

Here's the movie reel that I have done so far.


Still need to add music, voices, and finalize the shots

Tuesday, July 30, 2013

Johnny Textured

Recently, I've been working on my animatic or movie reel now that it's called. I haven't been posting it on here, because the movie has to be a really small size. Besides that, I've been working on character texturing and here is some pictures


Only a few more weeks of classes left. Got a lot of work to do.

Monday, July 15, 2013

Johnny Blendshapes and Animation

I've spent the weekend cleaning everything up and getting ready to be used in the animation. I'm currently using the Set and the Character as references. I got the first few shots in and will continue working on it throughout the rest of the semester.

I fixed the TV to make it look more 'real,' the idea of the cartoony TV didn't go down too well, but really, this is actually how I originally going to have it, so ya.


I've also been working on blend shapes:


Overall, I'm liking the results. Although the smile isn't quite what I want and the angry eyebrows seems a little too boxy.

Update 7/17:


I updated the TV to just two simple knobs

Friday, July 12, 2013

Johnny Rig Complete

After a few hours of trying to figure out how to work the eyes. I finally figured it out. Instead of orienting the eye mesh to a joint or locator, I aimed the mesh directly the control. Wasn't something I wanted to do, but it was the only way it would work. So I cleaned it up, I just ran into one problem: If the spine is twisted far enough back, then some of the neck joints flip. So, that's something I'm going to have to fix, but it's ready to be used in referencing


Here's some color tests:


Rigging Johnny's Eyes

Over the past couple of days, I've mostly been working on the eyes. This is becoming the most challenging part of the entire rig. Because I have the joints influencing the individual eyelid meshes, it's making things very difficult, because I can't mirror or copy the weights over. So, I discovered how to duplicate meshes that still has history on it. So in a sense, I've been able to duplicate the eye over to the other side with the joints skinned to the meshes. However, this puts translate values in some of my groups, which I don't want, but unfortunatly they're there. So, I put all the translate valued groups into their own groups with no translates, which I guess is a cheat way of getting around it lol.


My next problem is connecting it to the main rig. Because it's in a lattice, it's going to make things a bit different.

But good news is the rig is almost done, apart from blendshapes, which is my next task. Which means about half the control curves in the face are going to be gone.

Monday, July 8, 2013

Body UV, Environmental modeling, Organizing the outline

So since the last update, I've been reconsidering my joints vs blend shape ideas for the face. I've already said I was going to do the mouth in blendshapes, well I'm not considering doing the eyebrows, cheeks along with it. I think this way I would have more cleaner expressions, but it's going to take a little while to make the changes.

Anyways, this is what I've been working on:

finished modeling the body, then I UV mapped it


I also readjusted the Face UV map. This is as far as I can go with it, otherwise I'll have to start shrinking things down.


Along with that I've also worked on some modelling work. I fixed the chair so that the back is slanted backwards.


I modeled the TV. I went with a cartoon-y, classical, yet modern style, because I see my character as a reflection as myself and I consider myself kind of a traditional but yet modern kind of guy. I also modeled further the plane cockpit and redid the pilot's chair:


I also added rigs to everything, chair, boxes, shelves, doors, ect. Not the buttons, switches, and the cockpit. There are over 50 buttons, and I know I don't need that many controls.

I also organized the outline of the plane which is the first time I really touched the outline, so that took a lot of time. I also tweaked the character rig. Parenting things up, organizing the outline again. Just getting everything ready for referencing: background and character. Which that too is something I've been researching: how to reference.

I've ended up doing a lot of wrong during this week off, but I was still hoping to get more done than what I did... but, I am on schedule. So that's a good thing. For the most part I've finished modelling,  I'll just adjust models and add little miscellanous items here and there. Camera's have already been established. Rig and UV is almost done, which would make those things ahead of schedule. Blend shapes might carry me over to being done on time.

Saturday, July 6, 2013

Face Binding

I started working on binding the face. I figure in order to get facial animation, I need to skin the face up. I think it would be difficult using proxy for it instead for the timebeing. This is my first time skinning as well as learning to skin, and I know it's not perfect, I'll modify it further later on in the project. I'm finding this portion to be really demotivating. I don't know, parts of it is coming out right and others I'm not getting what I'm wanting.

Anyways, here's some pics of the skinning process:
 Here's base pose


Here's skinned, what's skinned: Hair, Ears, Eyebows, Lower Eyebrows, Snout, Ulva, Cheek, Lower Jaw (lower jaw has a stretch, like the cartoons where the jaw would drop to the floor. I don't really plan to use it too much, but it's there just in case.


Here's with Tongue and Teeth:


I think it looks weird with there being no eyes yet.

I think when it comes to the lips, I'm going to need to do blend shapes. I was kinda hoping not do it, but I feel like it needs it instead of joints. I was hoping to have the rig totally done by the time I got back to school, but now I have to learn how to do blendshapes now, but I'll see what happens.

Thursday, July 4, 2013

Johnny Face UV Mapping


So, yesterday I've been working on UV mapping the face, but for some reason I was not getting the results I was wanting and started thinking how to UV map. I was  getting extremely frustrated, working on it the whole day, the picture below is the results I was constantly getting, half of t was good, then the other half was a mess. This morning I finally thought, I wonder what the normals are like. So, I turned on the normals and somehow when I duplicated the mesh and then froze transformations, the normals reversed, so I had to reverse the normals back. I finally started getting what I was wanting.

So, I spent the day UV mapping the face correctly. I built a few color maps for the face, but unfortunately when I export the map, it brings along an alpha channel. Because I have Photoshop 'Elements,' I can't access that information. So, I have to wait until I get to the school to get rid of that. I've been thinking about getting Gimp (free program equivalent of Photoshop), but I haven't done it yet, which then I could probably access that information. This is a few pictures of that UV map and how it looks with a checkered file. I might try to reorganize the UV map arrangement a bit.


Wednesday, July 3, 2013

Eyelid Work

I haven't done what I was hoping to get done, instead I've been working on an instruction guide on how I did this rig. Which I believe will help me if I need to go back and edit the rig or for future rigs. I think it's a good idea since I'm already forgetting some of the things I did.

Although I have worked on the eyelid. I added a few joints to further control the eyes' expressions. I was hoping I would I wouldn't have to skin yet, but in order to get any facial animations... I need to. This is the first time skinning, didn't really know what I was doing, but honestly, it's not really that hard. I picked it up pretty quick.

The eyelid still needs a bit more work, maybe eliminating the middle joint and just leave the right and left joints, or mess with the skinning a little bit or blend shapes instead, which I kinda want to stay away from.

Tuesday, June 25, 2013

Modeling Progress

During the weekend, I've been doing some modeling work. I added a Kitchen with a refrigerator, stove, and counters. I touched up the lamp, the chair, and the coffee table. There's now some books occupying the bookshelf. I also added a hallway next to the TV that the picture doesn't show.


On the plane, I added ribs.


Modeled a plane for outside shots

I've done a little bit of work on the rig, trying to organize the outline, but other than that, not much to show.

By the end of this week, I hope to have most of the modeling and character rig done to decent level. Modeling will just need smoothening and beveling later on and the rig will just need finalizing.

Tuesday, June 18, 2013

Animatic Update

Added a few more shots to the animatic, mostly at the beginning and end of the short.


Schedule

Here's my schedule for this shortfilm as it stands right now. So far I'm on track.

Style Reference


This is along the lines how I would like my shortfilm to look. It's like a mixture between the traditional 2D style of animation and a 3D look.


 I like how this one ties elements that you would typically see in 2D animation, such as the 3D stars or lighting.

Sunday, June 16, 2013

Refernces and Face Rig's Plan of Action

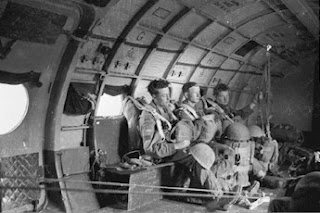
I did some research into old cargo planes from back during WWII.

Here's the inside


Here's cockpit views of some old planes:


Here's more of a newer plane


When it comes to newer ones cockpits are a bit more organized and lesser screens:


My idea of the cockpit in the film on the bottom of the image:


All the planes that I've seen follows a two pilot system, while my short film revolves around a one person pilot.

Face Rig:
Here's my plan of action


I'm going to make a joint chain in the snout to rotate it as well as squash and stretch.
The lower jaw is going to have a system to accommodate a cartoony jaw drop.
The eyes are going to be in a lattice and wrapped to the head, which is going to be in another lattice to squash and stretch head.
Eyebrows, eyelids, and lips will have controls to manipulate.
Ears, hair, tongue and the round dangling thing in the back of your mouth, will also have a joint system.

k

Thursday, June 13, 2013

Animatic


I noticed that the animatic that I posted a little while ago, didn't upload, so here is the animatic that I recently redone. The new shots are in 3D and I have the 2D shots in the upper left corner of the screen.


Progress Rig and Angle Shots

Recently I've been working on rigging Johnny in Maya, doing a bit of modeling, and changing some of the camera angles.

The rig right now is just a simple proxy model. At this point in time, I didn't finish the fingers, a head control, the mouth, eyes, or stretchable limbs.
Here's a few shots that I changed the angle on. The first 3 shots is when Johnny is twirling around the plane


These are only a few examples of the shorts that I either changed or just simply made the shot in 3D.

These are a few pictures of what I'm working on:

 I worked on the stretchy limbs. Only the rig stretches, not the proxy, when I end up skinning it, it will of course be stretchy then, but for the mean time, it's proxy geometry. The stretchy leg works fine, I used utility nodes instead of expressions.


The stretchy arm works fine, until I either undo a move or put the hand CTL back to 0. the CTL moves back, but the Distance locator doesn't. But as soon as I move the CTL again, the locator jumps back to follow the CTL. I'm thinking it might have something to do with where I parented the locator. Right now, I have parented straight to the IK handle and I'm wondering if I should parent it to a group instead, which I'll have to try. 


I added a hip and shoulder shoulder CTL (the little diamond shapes around the hip and chest area), that can also make the joints stretch, but I can't figure out how to connect it, I'm trying to study my professor's rig, but the setup is a little foreign to me.

I finished adding the FK neck system, onto the IKspline.


Here are a few examples of the eye with a lattice. I've been having that when I would rotate the eye geometry, the geometry would pop and dent in and out. I think I figured out the solution. Select the Transform all points in Lattice option. Which then, I redid the eye on the rig:


I added seperate eye lid inside the lattice, which will make it a lot easier to rig, right now, he looks a little unergized, which is a little un-characteristic for the this character.

Also figured how to duplicate lattices, which will be good, when I want to add blend shapes.

Summary:
Redone eye with eyelids
Redone angle shots
Added Stretchy limbs
Added an FK rig onto IKspline
Modeled teeth and tongue (Teeth are an in case if I ever will need it)

Things that I still need to work on:
Figure a solution to distance locator on arm
Connect hip and shoulder to IKspline spine
Add blend shapes to head
Organize the outline into a group
Connect neck and head rig to geometry

Animate